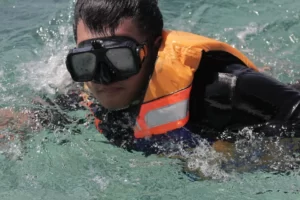


One of the cheapest, simplest, and fastest ways to enjoy the ocean is to snorkel. You only need 3 inexpensive and easy to carry items: a mask, fins, and snorkel. The most crucial aspect of the activity is your mask. It serves as your window into the aquatic world. It requires routine cleaning. So how do you go about doing that?
5-minute or less snorkel mask cleaning instructions.
- To get rid of any loose sand or debris, shake the mask.
- Rinse with fresh water
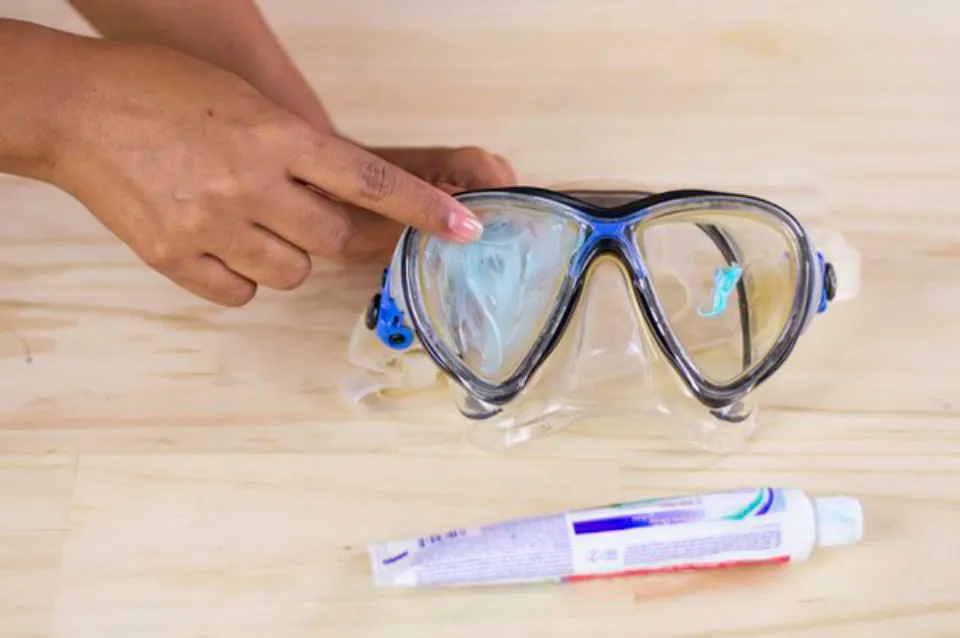
- To clean the mask lens, use toothpaste rather than gel.
- Using a soft-bristled toothbrush or clean cloth, gently clean the mask lens inside and out.
- Rinse with clean water thoroughly.
- Dry with a soft cloth.
- Store appropriately.
Could it possibly be any simpler? Those steps are specific to a glass mask lens only. If your lens is plastic, there are different steps. Different steps, which we cover in that post, must be followed if your mask is brand new.
If you take care of your snorkel mask, it should last you between five and ten years. When maintenance is so simple, why spend the time and money replacing it?
How to Clean & Maintain Your Snorkeling Equipment
Rinsing your snorkeling equipment after each outing is a basic yet effective way to help prevent filmy residue from forming and can reduce bacteria growth by clearing out sand, shell fragments, seaweed and other contaminants. To avoid scratching your equipment, we suggest cleaning it with a soft sponge or nonabrasive cloth. A scratch on your mask can not only make you less visible, but scratches are excellent places for bacteria to hide and develop.
Snorkels
It’s crucial to regularly clean your snorkel because the mouthpiece has numerous crevices where bacteria can grow and because you can breathe in debris that has become lodged in the tube. Rinsing in fresh water helps, but we recommend using dish detergent to fully clean the snorkel. For a more thorough cleansing, perhaps for a snorkel that has been sitting in the garage all year, soak the snorkel for up to 30 minutes in a bucket of warm water and a tablespoon of bleach. Following a thorough rinse in warm water, let the snorkel air dry.
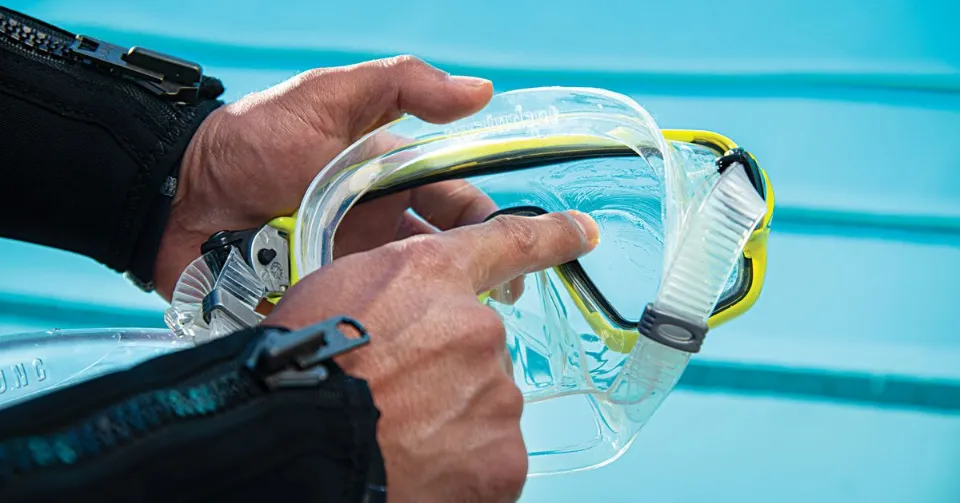
Masks
Because you don’t want to scrub the mask too hard and scratch it, proper mask maintenance can be a little trickier. You should start by adhering to the care instructions that most masks will have provided. The cleaning of a mask is occasionally advised, and you can buy the recommended silicone-based cleaning solutions at sporting goods stores or dive shops. Avoid using brushes or abrasive sponges and instead use warm water and dish detergent if you don’t have the right cleaning solution on hand. Make sure to clean the mask of all debris, dirt, sand, and salt. Additionally, make sure the mask is free of any sunscreen residue. After that, dry with a soft cloth or towel. To keep it clean and to avoid scratches, store your mask in its case, if you have one.
Fins
The Bahamas snorkeling equipment’s fins are probably the simplest to maintain. They can be washed in freshwater or allowed to soak in a bucket of warm, soapy water. Dish detergent can be used for this as well. Make sure to clean out any debris with a soft sponge or soft-bristled toothbrush (scrub lightly!).
We recommend cleaning your gear as soon as you’re finished snorkeling. Getting into the habit of prompt cleaning can extend the life of your snorkeling equipment. Many boats and charters have freshwater showers where you can rinse your equipment. Keep your equipment clean and well-maintained so you can visit the Bahamas again and again—snorkeling excursions there are always enjoyable and exciting!
When Do You Clean Your Snorkeling Mask?
Let’s start at the beginning. When should your mask be cleaned? All masks have specific cleaning instructions, regardless of whether they are full-face, plastic, or glass.
New
Your mask comes with a thin coating of silicone or plastic on the lens when you first buy it. This coating serves as both a protective barrier and a cosmetic selling point.
If that protective layer from the dry environment isn’t removed, it will lead to blurriness and reduced visibility underwater. Before your first use, you must completely remove this coating from the mask lens.
The steps are exactly as given to you above, if your mask face is made of glass.
Avoid using a brush on plastic lenses because you’ll ruin them completely. Use a clean, soft cloth (ideally one made of microfiber) to apply the paste instead. Again, paste, not gel. Additionally, stay away from any paste that contains abrasives or scrubbers.
An alternative to toothpaste is dishwashing soap dissolved in water or, my personal preference, a small amount of baby shampoo dissolved in water.
If you want to use baby shampoo or dishwashing soap, the best ratio is 15 drops to a 2.5-ounce spray bottle of water.
On the mask’s face, spritz it there. Rub the spray all over the mask lens—inside and out—using your soft, dry cloth. Get the edges and corners as well.
Completely rinse with tap water. To help get rid of any bubbles, use the clean parts of your cloth. With a different dry, clean cloth, thoroughly dry the area.
I like the baby shampoo method because it is simple to use, portable, helps with eye fogging, smells good, and never hurts my eyes, even if I don’t rinse it off completely. Dishwashing soap is also frequently kept on hand by dive and snorkel boats in case you forget to do this step prior to your first trip.
After Each Adventure
How thoroughly you clean your mask after each dive or snorkel adventure depends on its use that day and your own preferences. Some people only need to lightly rinse the mask with tap water, dry it, and call it a day. If you’re going on a multi-day vacation and only want to do quick rinses every day, that might work.
However, you should thoroughly clean your mask after each use if you want to get the most out of it. Once you have purchased your new mask, adhere to the instructions precisely. Again, the same differences between cleaning plastic or glass lens applies. It is important to thoroughly dry the mask before storing it until it’s next use.
Also important is a careful examination of the “skirt” and strap(s).
The part of the mask that wraps around your face and is held in place by the skirt is made of rubber, soft plastic, or more frequently, silicone. The skirt that the mask is sealed with is what keeps water out of your eyes.
Examine the skirt region in detail. Remove any sand, rocks, or other debris with care. If you’re snorkeling in saltwater, look for any salt build-up. In particular, pay close attention to junctures and crevasses.
Before storing the mask, make sure the skirting is free of any accumulated dirt, debris, or salt. I do this after the first freshwater rinse to prevent sand from adhering to and scratching glass or rubber components.
Season End
Do a thorough cleaning of the mask, skirt, and strap at the conclusion of snorkeling season or when you know it will be some time before you can go snorkeling again.
Use clean, soft cloths to carefully and completely dry every area. Then, store your mask in safe place.
Out of direct sunlight is a good place for storage. It also includes putting the mask somewhere where nothing will rub against the face of the mask and possibly scratch it. A space with only moderate humidity and a temperature of room is what you want. Sunlight and humidity won’t harm the mask lens, but exposure to sunlight hastens the silicone components’ deterioration.
No matter when you are cleaning, you should avoid touching the mask lens directly with your fingers. In the old days, we used our fingers to smear anti-fog, apply toothpaste, and pretty much do anything else you can think of.
Our fingers are very greasy and can get dirty, though, if we think about it. Skin oils from the fingertips can get on the mask lens, giving dirt and bacteria a wonderful place to hold onto. Instead, I advise using a cloth.
Glass Lens Vs. Plastic Lens Vs Full-Face Mask
Let’s look at any additional cleaning concerns we might have since I’ve already described how to clean facemasks with glass or plastic lenses.
The snorkel on full-face masks is a part of the mask itself. If you don’t thoroughly clean the skirting and hinge, this could end in failure.
You’ll need to replace that mask much sooner than you think if you allow some sand or other debris to accumulate in that hinge.
You can remove any visible sand or debris by rubbing across the area lightly, while running tap water across it. Again, we are talking about the skirting only. Avoid rubbing the mask’s face against any sand or other debris. You could scratch or abrade it.
Try using canned air to blow the debris out of the hinged area if that doesn’t work.
Before stashing that full-face mask away for the next time, make sure the GoPro attachments, which many of the full-face masks have available, are also clear of debris.
Clean the Skirting, Too.
As I briefly mentioned earlier, it’s equally crucial that you keep your mask’s skirting clean and in good condition. People often neglect the other parts of a mask in favor of concentrating on keeping the lens clean. Since the skirting is what keeps the mask properly in place and it is the feature that provides the watertight seal you’re looking for, you want to clean and maintain it just as well as the other portions of the mask.
Most skirting is made of silicone. You will get equipment that lasts longer and performs better if you keep it clean, dry, and out of the sun when not in use. Beyond simple longevity, having a damaged skirt will result is less time playing, less fun in the water and can ultimately ruin a really great day.
Since the skirting is a major cause of mask failure, it is crucial to clean it. The only thing I can think of that makes a mask fail more quickly is initially purchasing an ill-fitting mask.
If your skirting becomes overly soiled, it won’t be able to effectively seal against your skin.
Keep in mind that your skin naturally produces oils. You’ve probably applied a ton of sunscreen on top of that. All of this rests right on the silicone skirting of your mask.
Oils are dirt magnets. You’d be surprised at how quickly the skirting gets grimy if you let it go for a while without cleaning. Those oils also hold salt particles and sand against the skirting and your skin.
Over time, the silicone can become brittle and begin to break down. Bends or warps may also appear. The failure of a mask is caused by all of these problems.
Do you want to spend your day fiddling with the water in your mask or checking out great coral formations and marine life?
You can clean the skirting with toothpaste and a soft-bristled brush if this is just a general cleaning and it isn’t discolored or mildewed. You can also use your microfiber cloth, if you prefer.
I advise using a bleach/water solution to clean skirting that was once opaque but is now yellowing or has mildew on it.
In 2.5 ounces of pure tap water, 5 drops of bleach should be sufficient. Cover your lens first, so you don’t risk any damage to it. Spray the mixture onto the strap or skirting, as desired. After letting it sit for about 2 minutes, use a cloth to wipe it away.
If you choose the bleach mixture, you need to rinse it thoroughly. Make sure you get all the bleach off, no matter how weak the concentration used. If the silicone isn’t thoroughly rinsed, the bleach will actually destroy it.
I like using bleach because it will remove any mold or mildew that might be on the strap or skirt.
After finishing, completely dry the mask. Place it outside for a few hours or use a towel. You can use a blow dryer, but make sure to use it on a low setting and keep it far enough away from the silicone parts to prevent warping and distortion. Simply put it on a towel every night while on vacation or for a few hours after your post-trip cleaning is finished at home if you don’t want to take the chance.
Why is Mask Cleaning Important?
Most likely, you’re wondering why cleaning is necessary at all. Keep that facemask spotless for a few very practical reasons.
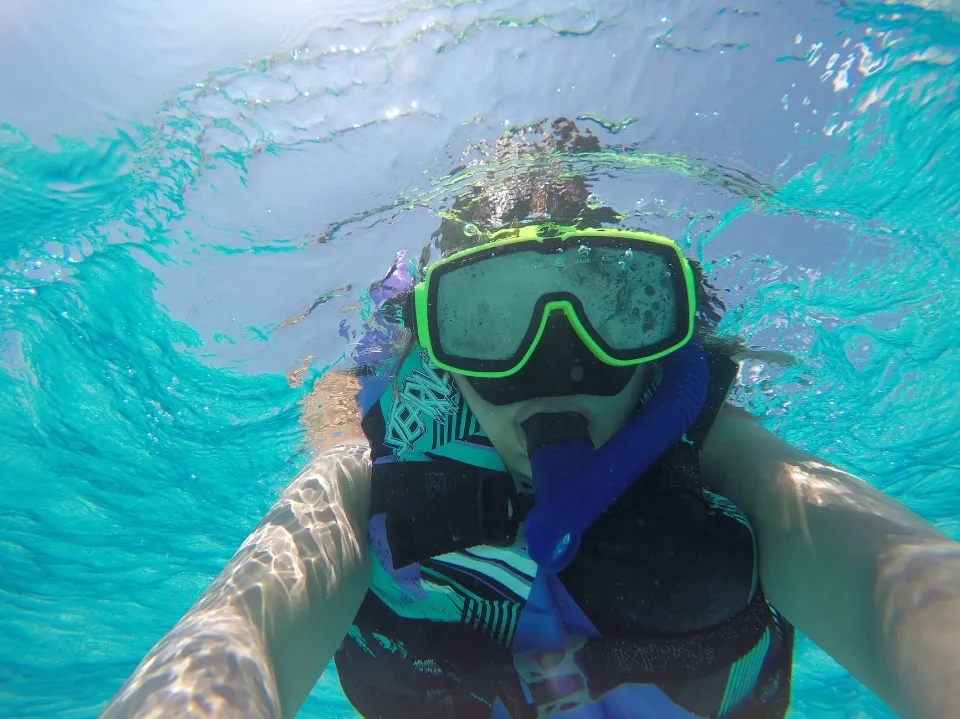
Visibility
Wearing a snorkel mask is solely for visual purposes. Underwater, visibility tends to be a little distorted anyway. The 50–100 feet of underwater visibility may not be enjoyable if you add a dirty, smeared, or unprepared mask lens to the mix. You came to see the amazing reef colors, after all.,and some of the most interesting marine life is tiny. Simply put, snorkeling is more enjoyable without a blurry or fogged mask.
And if you are trying to get good underwater video using a GoPro camera or a top-rated budget waterproof camera, being able to clearly see the controls and focus your camera is important, too.
If the skirting rather than the lens is the issue, your mask will leak, which is almost as annoying. You will get water, probably saltwater, in your eyes from the mask. If you didn’t know, saltwater stings your eyes quite a bit.
Fogging
The main difficulty the majority of snorkelers encounter is as follows. When a mask fogs, water droplets inside the mask condense, causing the fog to appear. To what are they fastening in order to compress?
the initial silicone layer that was applied to the mask when it was shipped, etc. A clean mask lens significantly reduces mask fogging. Some experts claim that no additional anti-fogging measures are required if you clean your mask as directed each time.
That’s right, none of that nonsense, like anti-fog spray or spitting into your mask. merely fundamentally sound upkeep. I still spit in mine for good luck. My wife despises that behavior. So there is also a side benefit.
Durability
Even though I’ve said it before, it’s important to reiterate. A clean, well-maintained facemask will last longer. Facemasks costing $50 or more can be used for five or even ten years after purchase with proper maintenance, extending the lifespan from a few short years.
My go-to scuba mask, a dull double lens colorless mask with a clear skirt and clear frame that has lasted 15 years, is still in good condition. Why change something that already functions well? Besides, by getting longer life out of your mask and other equipment, you reduce waste by not discarding things as frequently.
Hygiene
Honestly, I’m not a neat freak, but our masks get pretty soiled. If you take your mask on a cruise, an extended stay at a resort or family vacation to the beach, you may use it several times per day. Possibly only briefly each time, then again later that day.
My mask and strap become quite oily and grippy due to daily exposure to salt water and repeated applications of sunscreen. Additionally, we travel throughout the entire year, frequently diving and snorkeling. Therefore, if we neglected to regularly clean our equipment, it would soon become fairly dirty.
Cleaning Snorkel and Fins
You should at least occasionally think about cleaning your snorkel and fins in addition to your mask.
The fins are pretty simple to use. They should be cleaned off with fresh tap water, then hung to dry in the sun. When they’re fully dry, store them out of direct sunlight in a cool, dry location. I store mine on a shelf in the garage in a mesh bag. In the closet near her travel bags, my wife keeps hers.
The snorkel is a little more challenging to clean than other components, with the possible exception of your mask.
I’m aware that a lot of people rarely clean their snorkels. Just for a moment, I want you to think about what happens to anything when water is allowed to sit in it. Mold, bacteria, and/or mildew can grow there.
As a result, I regularly clean my snorkel. According to recent viral pandemics, it is very easy to do, cheap, and has some health benefits. There are several different approaches.
Bleach and water. One tablespoon of bleach should be thoroughly mixed with one bucket of water. Place your snorkel in the bucket (wear gloves for your protection) and let it sit for 30 minutes. Make sure the water is inside the tube. Thoroughly rinse, then let air dry.
Dish detergent and water. A bucket of water should be mixed with 4 Tablespoons of liquid dish detergent. Put the snorkel in the bucket, making sure the cleaning solution is inside the tube this time, or bubbles will form. Let is sit for about 30 minutes. To remove any remaining dirt or debris, scrub with an old toothbrush. For an additional 30 minutes, re-immerse the snorkel. Rinse thoroughly and let air dry.
Vinegar and water. If you don’t care for either bleach or detergent, vinegar can be your go-to. Recognize that you will likely need to use more vinegar and detergent to scrub the surface. Follow the exact same instructions as the step involving the dishwashing liquid and water.
Final Thoughts
One of the most crucial snorkeling accessories is your mask. The snorkeling mask serves as a window into the underwater world, so it must be properly and regularly maintained. You can use your snorkel mask for many years to come by following these instructions on how to clean a snorkel mask.